Painting a chinoiserie nursery - the entire process
By Diane Hill
|
7 min
Welcome To My Very First Blog Post!
I really like the idea of connecting with my audience in a more personal way. So I thought I would talk you through the process behind this Chinoiserie room I painted for my new baby, including my thoughts, inspiration and techniques, even my pitfalls and how I fixed them!
I hope you love the room as much as we do!
SO! Let me get started with my first post - how I transformed a dark, dreary room into a chinoiserie paradise for my new born baby.
Thats my baby above, wee Bonnie. The name Bonnie taken from my Scottish heritage, (I'm half Scottish, half Jamaican) my Granny always called me a Bonnie wee lassie, so it seemed fitting to pass onto my newest love.
Above, she is a year old, I started planning her nursery room when she was new born...so that's an entire year in the making!
Before I Get Into How I Did It, Lets Take A Look At The Final Result...
Bonnie adores the room, with flying birds and butterflies there is always something to look at, it's her little haven
Starting With Sketching
Now let me show you what the room looked like before! It was a tired and damp box room in need of serious TLC. And wow did we work hard!
Not just us, but our family and friends. If you've ever removed old rice filled wallpaper, then you will know the struggles!
The first stage in my design process was to sketch the layout. The design was inspired by antique Chinese silk wallpapers. I studied the painting style and basic elements, but gave them a modern uplift with vibrant colours, clean lines and a more open composition.
Click the image below to see more Chinese wallpaper in National Trust houses. And why not take a visit, trust me you won't be disappointed!
As this was my first mural project, I was slightly nervous about how the design would look in the room.
I wanted to ensure the design was carefully placed so that the most beautiful areas were visible immediately as you walk in the room. So I turned my sketch into these 3D visualisations, which helped me to get a truer sense of the final result.
The next stage was to decide the colours. I am very passionate about colour, I agonise over choosing the right colour combinations, this part can often take the longest of all. I always paint a sample and keep it with me throughout the process.
For this mural project I knew I wanted bright vivid colours that sing, but I also didn't want it to feel over the top. It needed to be liveable, not too wild and wacky! So I balanced the bright flower colours with slightly more subdued leaf tones, like the ones at the bottom of the sample below.
Colours Finalised, Plan Sketched...Let Me Take You Through Each Step!
The black and white miniature drawing is followed very accurately. I have the design next to me on my computer so that I can easily measure exactly where each element starts and finishes.
This is a very important step, if the design is not drawn accurately at this stage, then the outcome will not be as the client (Baby Bonnie!) expected.
1. Paint In Background Layers
In this design, the bamboo forms a background and is the first element to be painted.
2. Leaves Come Next
It is more economical to paint each element in batches.
3. Adding In Finer Foreground Details
This is where things get interesting and the design starts to form a pretty picture. I am obsessed with details, my aim is for people to want to look up close at the design and if they don't say 'wow'..... then I know I've failed!
The Chinese peacock took a full day to paint, I just kept going with the fine detail until I knew I'd got that 'wow factor'!
4. Technique
When working on a background that is darker than my painted design, I start by painting a layer of white, that way the colours really pop! I then paint a layer of lighter colour, here it was a light pink, then on top of that I add deeper shades.
The shading is the hardest part, and is what gives my murals a luxury, high end feeling.
I was trained in China how to shade colours using two Chinese paint brushes. The process is to lay down the paint and quick as lightening drag that paint with a damp brush until the finish is smooth. If you'd like to see a blog post on how I do this then let me know!
I also have an 8 year old daughter, Rosie, who loves to paint as much as me, so how could I not! And that's my husband Matt who joined in, albeit with a little hesitation and reluctancy! What a great job they did!
6. The Moment I Realised I Had Gone Wrong!
For some reason I decided to paint all my peony leaves in this bulbous kind of style, which upon deep reflection really niggled at me. I tried to convince myself it was ok, because what was I supposed to do? It was already done!
Well I am a perfectionist and there was no way on earth I was going to let those leaves eat away at me for another day! So I made a wild move and sanded back two thirds of the leaves, until they were completely gone! This also removed the turquoise from behind it, so I carefully painted back in the turquoise, added a brand new set of leaves and amazingly the result was flawless!
I feel that the new leaves are slender and prettier!
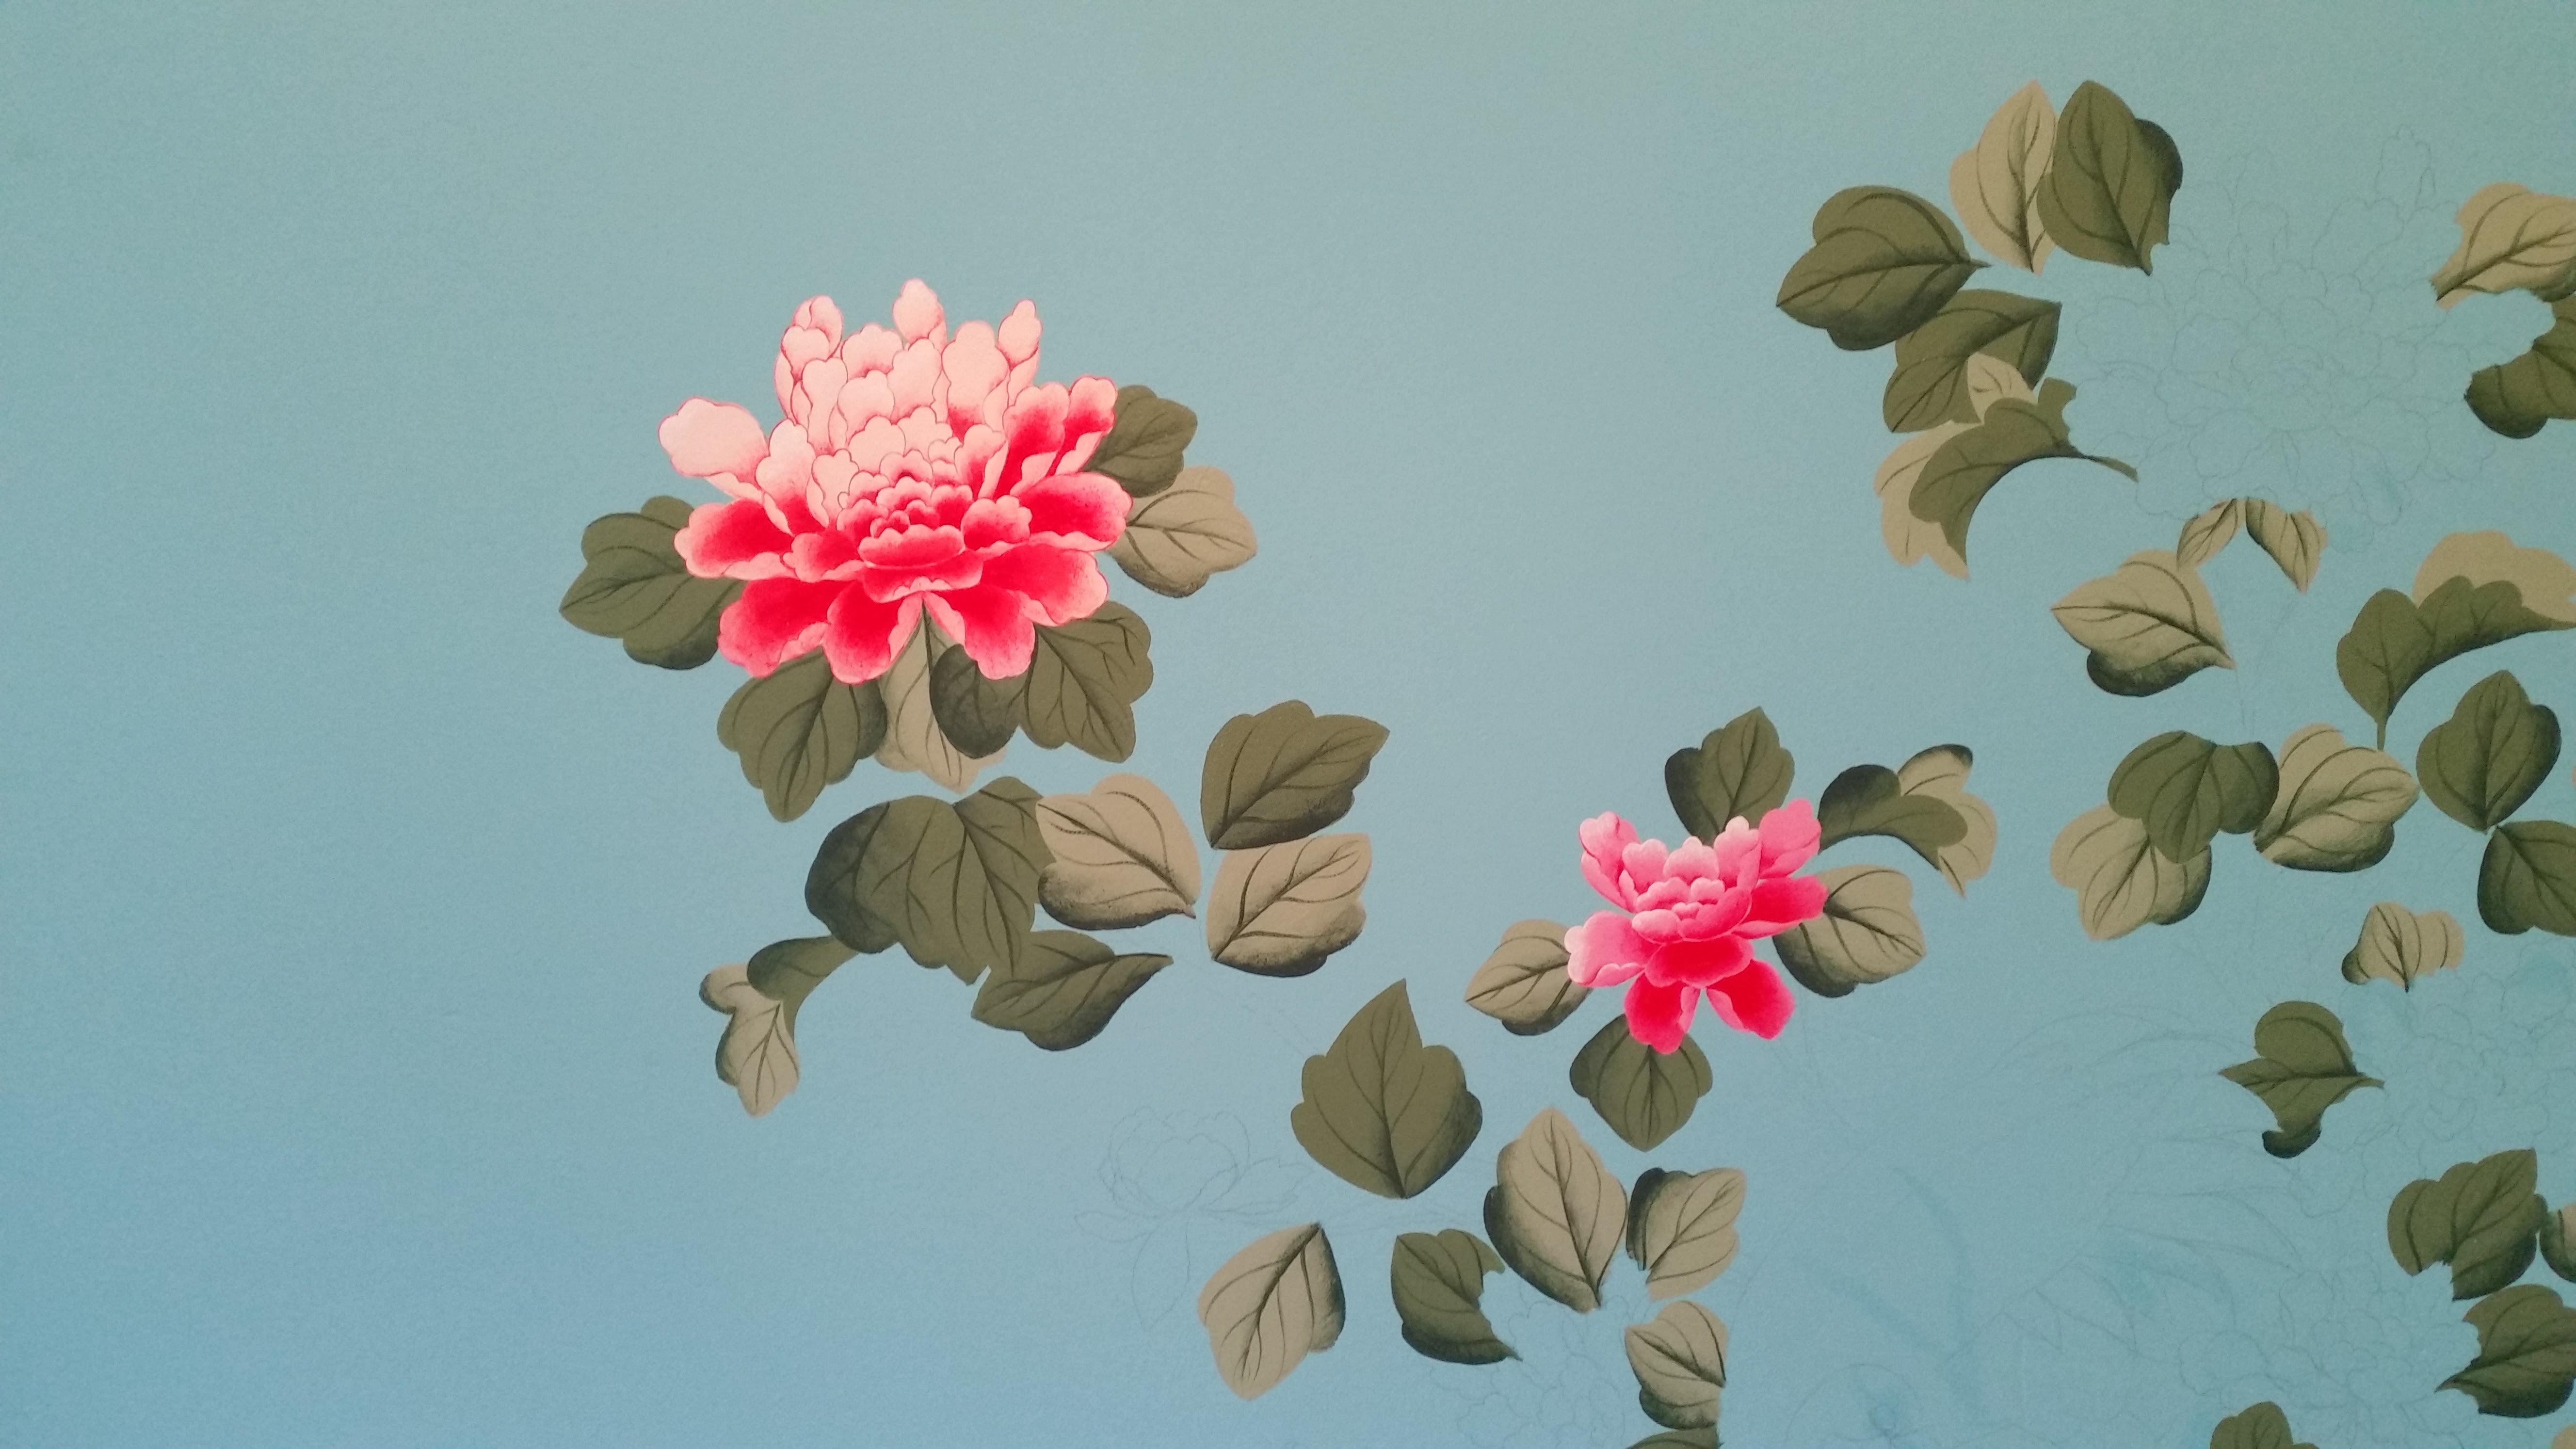
7. Painting Branches
I thought i'd experiment with a brown branch, but I wasn't really feeling it! It just didn't quite tie into the whole scheme. So I decided on a deeper turquoise, which sat just right for me.
On reflection, it may have worked ok, (I reckon some of you are thinking the brown looked good!) but it was just another thing that niggled at me. If something niggles at me, I feel anxious. If nothing jumps out at me, then I get a good feeling and I know everything is working in harmony.
Just as a reminder, the image below shows the updated branch. I think it feels more contemporary and allows the flowers to take the limelight a little more!
A Year In The Making, And The Launch Of My Business
Completing this room was such a huge deal, I felt like I had achieved the ultimate goal!
Because this was for my new born child, there was so much emotion here, I agonised over every detail because I wanted to create something perfect.
This room means the world to me, it was the beginning of a completely new path in my life. Initially it was just for fun, and because we were renovating the house, little did I know this would become a new career path!
I took the plunge and presented the final images online, the response was overwhelming. It was clear I had to take this further and launch my new career. I am now writing 11 months into my business, having painted for several wonderful clients and am happier than ever, all because of this room!
This is a true reflection of everything I love about design. Bright, colourful and happy colours....but with a touch of class! Wink wink!
If you’ve ever dreamed of turning your artwork into murals, art prints, or even wallpaper designs, my beginner-friendly workshop is the perfect place to start. Alongside learning how to paint a beautiful chinoiserie piece step-by-step, you’ll also discover how to start sharing (and even selling) your art with confidence.
In lesson three, I gently walk you through practical tips like how to price your work, which paints and materials to choose, and how to start thinking about your art as something that can grow into a business—if that’s something you’re excited about.
It’s a really special lesson that's helped hundreds of students feel more empowered and clear on their next steps.
I hope you enjoyed my first post, I'd love you to follow me on my journey!
Please join my artists community, share, like and most importantly please pin my images, Pinterest is THE place to be right now!
And if you like my work, you can find lots of chinoiserie chic designs here in my shop :)
Please leave comments below, whatever they may be!
Much love, and if you made it to the end......THANK YOU!
Diane this is just beautiful!! I am so inspired by you and have loved being part of your first online class and also am excited to move forward with more education from you and cheer you on as an incredible teacher💕💕💕
Lovely work!
I love your beautiful mural, I am just about to start mine…. I have the design and have painted the individual pieces of the design. I am a bit nervous to start but I figure you can always paint over it!!
I now feel inspired and ready to start.
Thank you
21 August 2022. That is the sort of room that I would have a lock on the door and I alone would just go and sit it it for hours. It took you a year to make it I think it would take me the rest of my life to just sit and take it all in. Good luck with your new business and little Bonnie. Lots of love and best wishes The Gamble family
Hi Diane
Your work is amazing ☀️
Could I see the blog on how to drag the cloth through for the smooth finish your talking about ?
Yours kindly
Karen x